Happy Thanksgiving, here’s the third iteration of my meta box generator for WordPress. Below is a summary of the features and how to use it. I’m interested to hear your thoughts and ideas for what to add/change moving forward.
Meta Box General Settings
Title and description are leftovers from the previous versions. Key prefix, text domain, and class name add some additional options that will allow you to have multiple instances of the generated code without causing conflicts. These are automatically generated based on the meta box’s title if you don’t define them yourself.
- Title: The title of the meta box. Appears at the top next to the arrows to expand/collapse and reorder the meta box within WordPress’s admin.
- Description: Appears at the top of the meta box, under the title but before the fields.
- Key Prefix: Values in WordPress’ are stored as metadata for each post. The prefix is prepended to the key in the database to avoid conflicts.
- Text Domain: The text domain is used to translate themes and plugins for internationalization. This field should be modified to match what’s being used in your plugin or theme.
- Class Name: The generated code is contained within a PHP class. The class name can be modified if you need to create more than one set of meta boxes using the generator.
Location Settings
These are all leftovers from the previous versions. They are used to position your meta box within the WordPress admin section.
- Post Type(s): Select the types of content you want the meta box to appear on. Check all that apply.
- Context: The section of the editor where you’d like the meta boxes to appear. “Normal” and “advanced” are vaguely similar and “side” will make it appear in the sidebar of the document settings.
- Priority: This will control what priority it is given in the current context. By “default” it tacks it on to the end but you can add it closer to the top with “high” and “core” or further down with “low”.
- Custom Post Type(s): Any custom post type(s) defined in your theme or plugin can be referenced here, comma-delimited, by ID, to add the meta box to them as well.
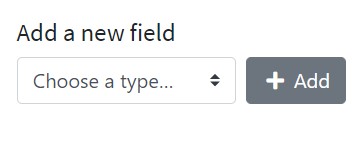
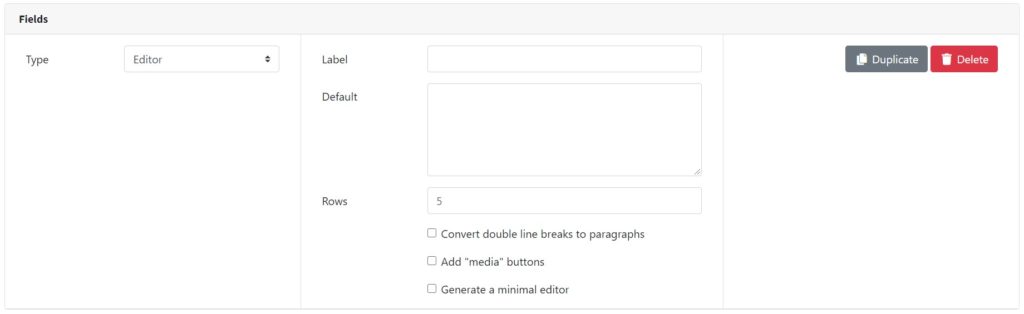
Meta Box Fields
Now we’re adding the fields. You’ll choose a type of field then click “Add”. Once you’ve added a field you’ll be able to set the options for it.
Each type of field has a label, default value (where applicable) as well as its own options. The “editor” for instance has the following unique options:
- Rows: Number of rows (height) of the editor’s text area. In much the same way as “rows” works for the
textareaelement. - Convert double line breaks to paragraphs: Does what it says. If you return twice in the editor it will replace this with two paragraphs instead.
- Add “media” button: Adds the button to the editor that allows you to add/upload media for this editor.
- Generate a minimal editor: Gives the user a minimal editor with far fewer options than it typically renders for the editor.
You can also duplicate and delete fields using the buttons to the right.
Another useful feature that was included in some of the previous versions was sorting. If you have fields already you can click the “reorder” button to enable this option. Extra fields will be hidden and a drag-and-drop handle will appear on the left of each field that you can click and hold on to rearrange the fields to the order you want.

When you’re done sorting you can either click “edit” to go back to editing or perform one of the other actions on the page, like “generate”, to move on.
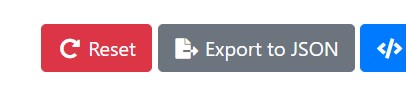
Resetting, Exporting, and Importing Settings
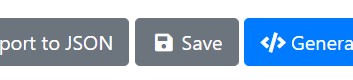
The “reset” button does what it says. There’s a confirmation dialogue but make sure you mean to reset the entire form before you click it. A new feature added this time around is the ability to import/export your settings for later use or editing.

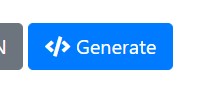
Generating Code
Clicking “generate” will do what you expect. You’ll be redirected to the top of the form with a new text area full of code. There’s also a convenient “copy to clipboard” option available to you. You’ll take that code and drop it into your theme’s functions.php file or the appropriate place within your plugin files. Give it a try and let me know if you have any questions or ideas.

Updated 2020/12/18 – Registered Users Can Now Save Their Meta Boxes on the Site
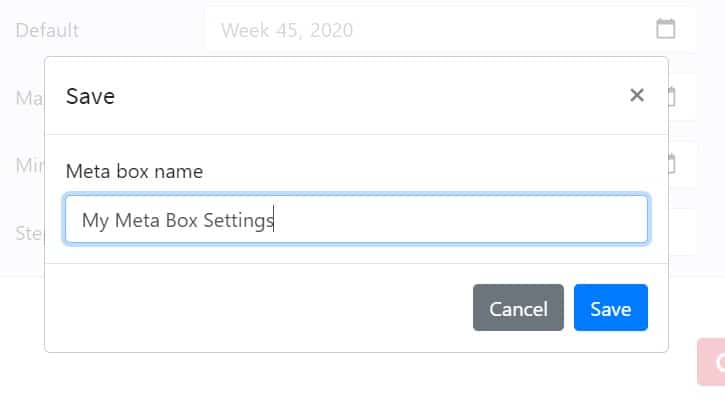
If you’re a registered user you’ll now be presented with new options to save and load your meta box configurations within the site. Once you’ve added some new fields to the generator you’ll see a new “Save” button at the bottom.
Clicking this button will bring up a modal window for you to give your settings a name. I recommend giving it a unique name, perhaps based on the project you are working on. There’s no reason why you can’t have the same name for all your configurations but that might make them a bit difficult to find in the future.
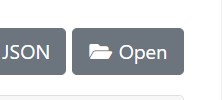
Once you’ve saved a configuration you’ll have an option to “open” the next time you come back to create new or edit existing meta box configurations.
Clicking this button will bring up a modal with all your saved configurations to be loaded, edited, and saved/generated again.
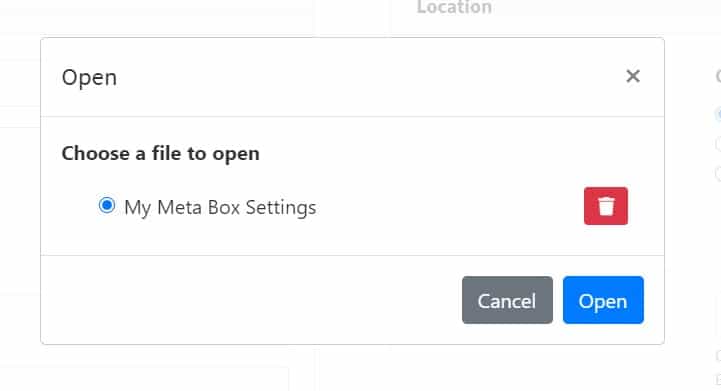
Select the settings you want to modify and click “open”. You can also delete old configurations if you no longer need them by clicking on the corresponding “trash can” button.